Showing posts with label Trees. Show all posts

Wednesday, September 8, 2021

Terrain Tuesday Tree Renovations - Part 11 Bigger is Better


Bigger is Better when it comes to Trees

As my collection is predominantly 28mm (4500 odd painted figures) I have decided to up my anti and build 28mm scale trees particularly for my Gaulois collection and dark age/early medieval before the fields really started to be tended locally, plus really good for my larger forest stands. These trees are made using my usual practice of oven dried hedge clippings then rubberised horse hair and then woodland scenics powdered flock, basing products, and a large washer on a 50mm base so it fits the magnetic tree base.


If you look at part ten you will of seen a tutorial my method of construction step by step Here


Very happy with the first six, now I need some more flock !


28mm Trees


The Bigger trees are from 18-26cm tall, with magnetic bases to go into the forest bases.


Cheers
Matt

Tuesday, August 3, 2021

Tree Renovations Part 10 Tree Tutorial

 Terrain Tuesday Trees Part 10


Making a wargames tree......

On Sunday I decided to finish off some more trees for the 20mm terrain. You can never have enough trees and I like to have a lot of them in various sizes and colours. I have been making trees for 30 odd years, wire armatures, sticks and commercial boxed ones. I can remember making some when I was around 15 years old using tree sticks and moss from a Stan Catchpol modelling workshop, military modelling article.  Since then I have made several hundred, particularly when I run the Goulburn Valant Stormers Wargames Club, but when I departed Australia I parted with my real timber ones, so upon arrival in France I needed to replace all of them except the evergreens. I prefer to buy my evergreens mostly from model railway companies and make my deciduous trees.

My preference for trunks is hedge cuttings as they already have the branches. Last year I cut down a box hedge in the garden so now have a lifetime supply of branches, which were oven baked then put in boxes awaiting use, classified into 20mm (up to 20cm high) and 28mm (up to 50cm high)

How too


Step 1.
I simply select a number of suitable hedge branches from the stockpile.

Step 2 
Using a hole saw I cut from 3mm MDF 40-50-75mm bases depending upon tree size.


Step 3 
I attach with hot glue, sometimes I also add a tack on large trees, plus make a base and roots too from green stuff.


Step 4
With a 60/40 mix of PVA I paint the base then sprinkle with my builders sand mix, I grade my builders sand into rough and light, I use my rough mix as I get as a bonus rocks and bts on the base. 


Step 5
I paint the base dark earth brown, then dry brush with a tan colour to match our soil here in southern Normandy/Pays de Loire, paint the stones then ink and drybrush. 


Step 6
I tear up the rubberised horsehair into clumps spreading it out into the canopy shape, then attach the rubberised horsehair with hot glue. I buy my rubberised horsehair from upholstery suppliers in the UK.


Step 7  
Select Flock colour, some people make theirs but I have never bothered, I use woodland scenics or NOCH, Faller products.  I use light green, middle green, dark green or even orange-brown (for Autumn) sponge fine flock. I use a deep plastic box for the flock so I can shake off excess and catch it all.


Step 8
I then using latex or washing up gloves I cover the base, placing the tree trunk  between my fingers. Then I use a hobby spray adhesive (from a $2 shop) on the rubberised hair, coating it liberally. The Selected Flock colour is poured into a box, then sprinkle my selected colour, let set, then a second application.


Step 9
I then may add a sprinkle of mixed leaves or colour (white, red and yellow for plane trees, fruit trees in blossom). 

Step 10
I then Varnish the tree with gloss varnish.


Step 11
Clean up and neaten up with scissors, some can have a few character pieces you can leave or cut off. 

Step 12
Add flock, bushes and flowers to the base. 


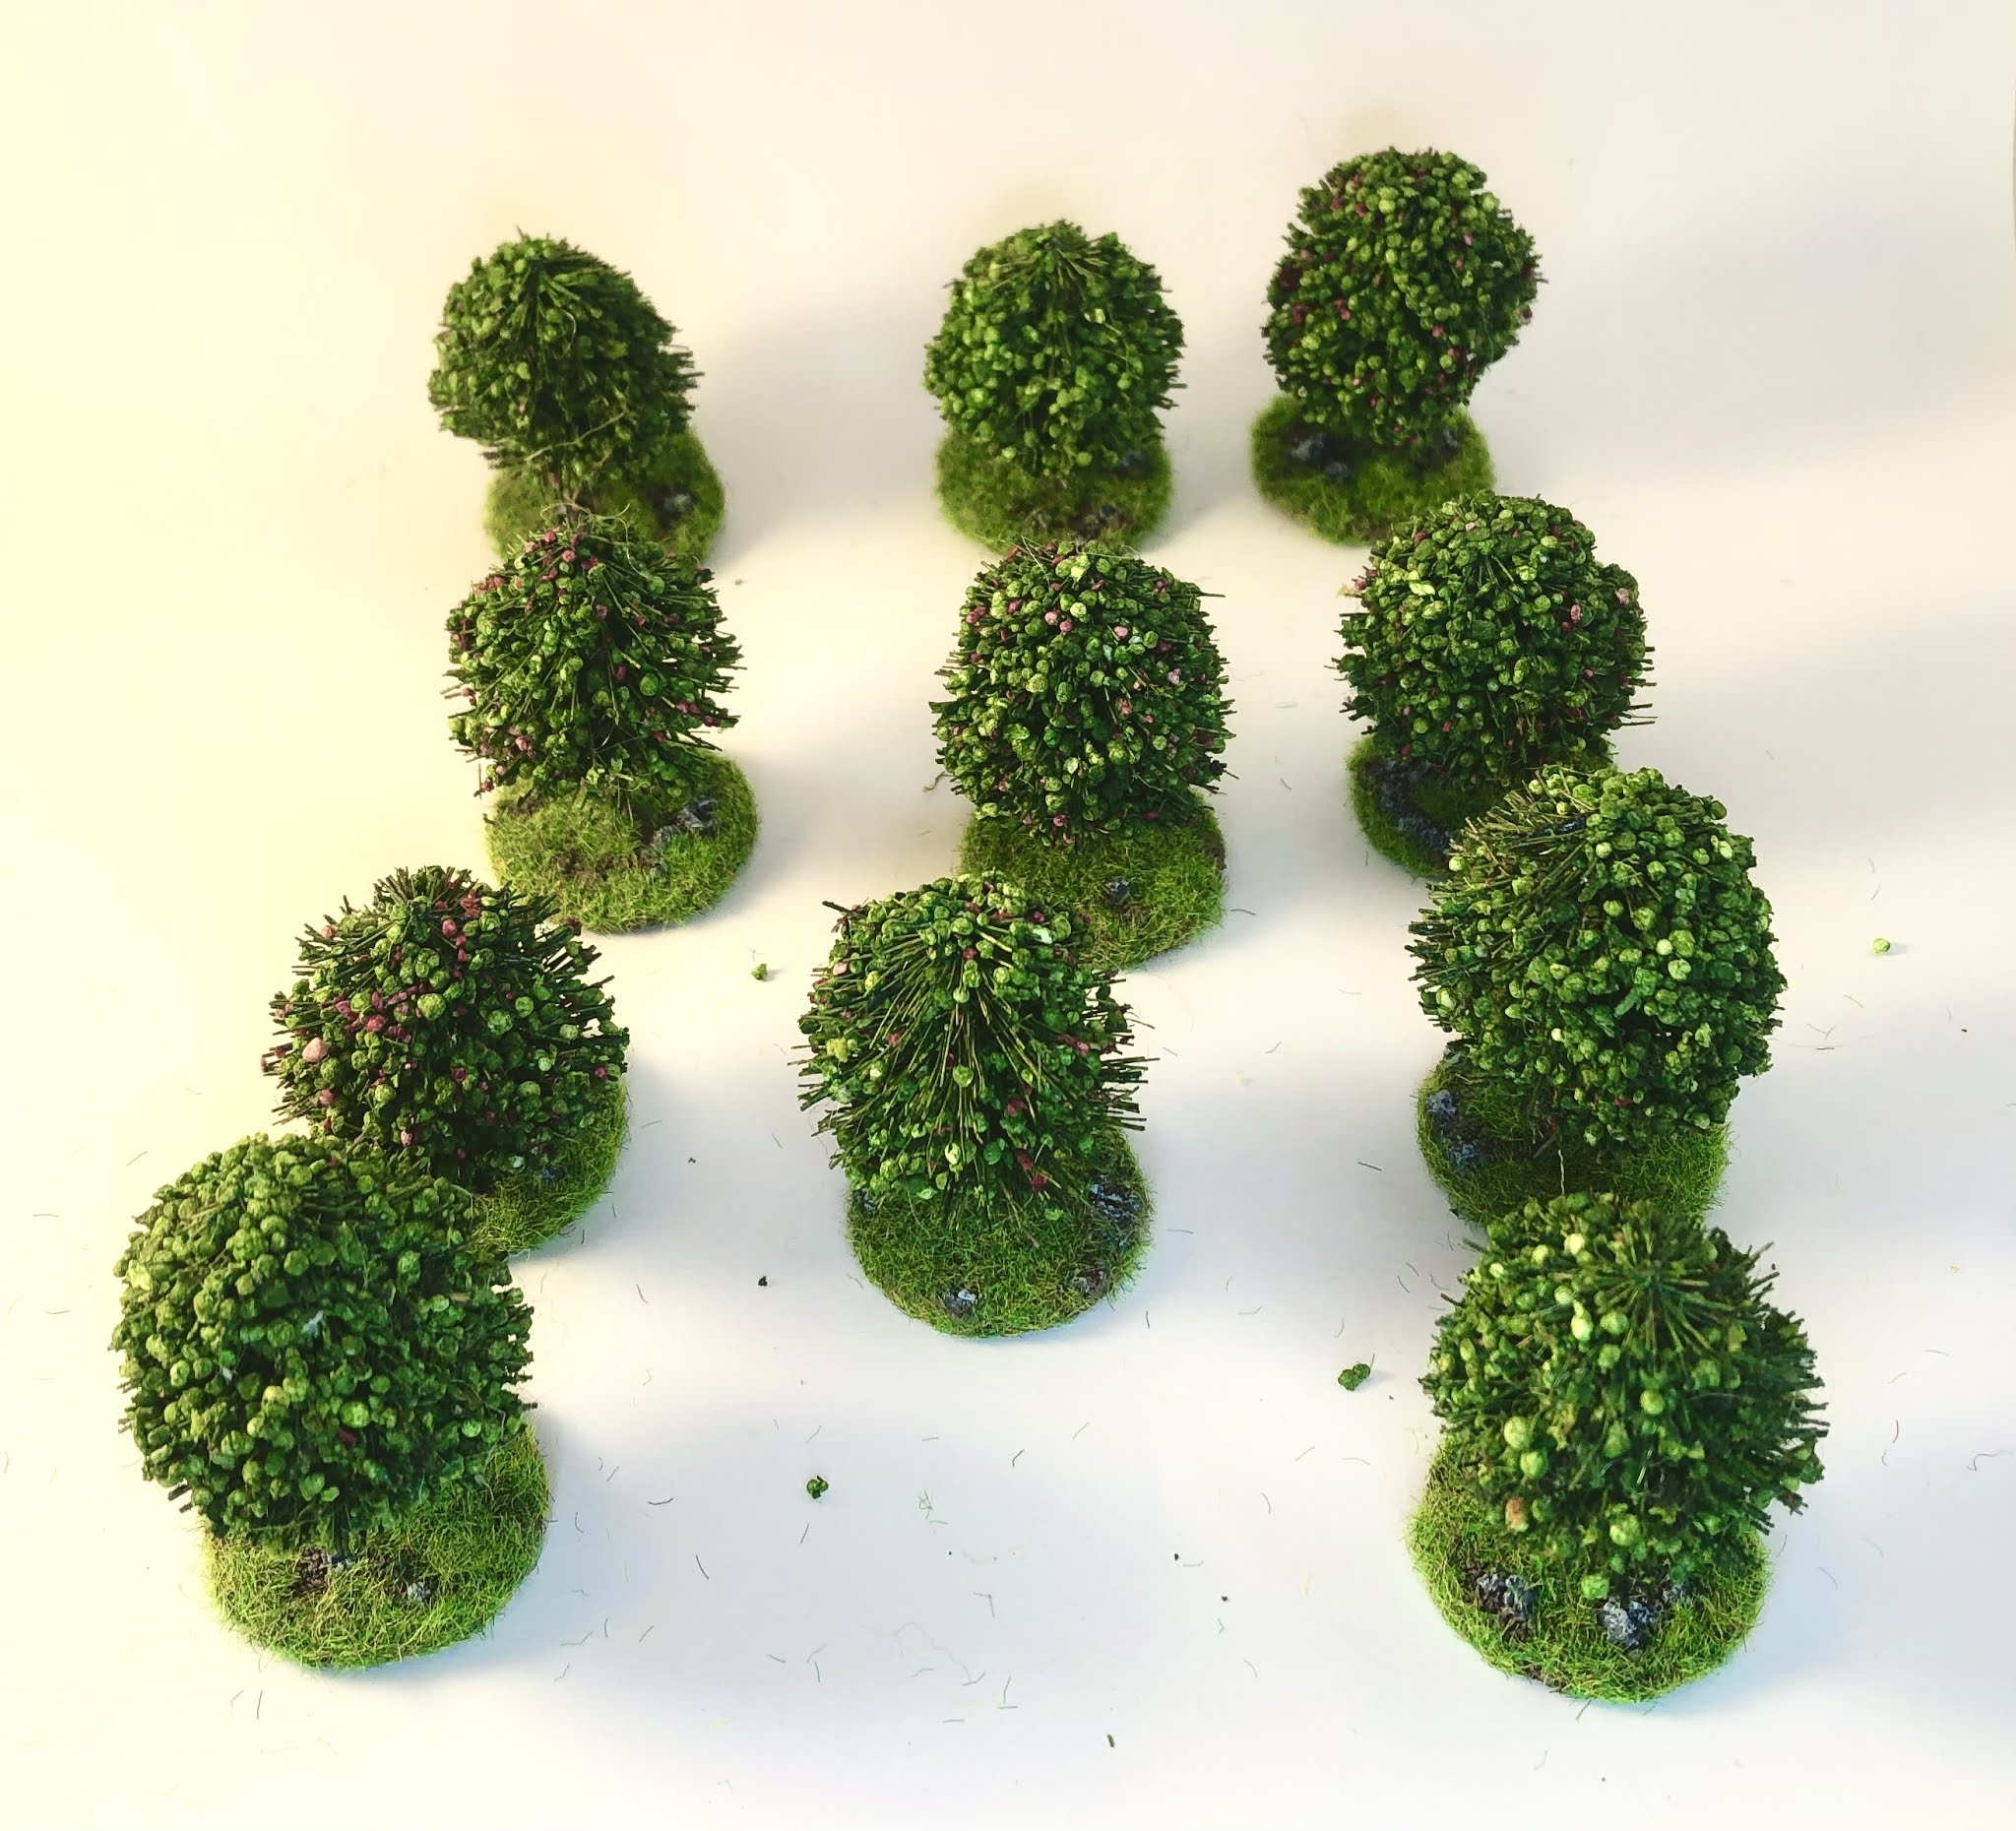
Simples, ok several hours work over the least three days. I tend to do batches of twenty odd trees at a time.

I still have another 50 plus odd to go but I have run out of middle green woodland scenics as I completed some new 20mm bocage for the ww2 Normandy table as well, but waiting on more flock........For some variation of my 28mm trees I am about to commence my first sea moss trees so wish me luck!

cheers
Matt

Monday, February 22, 2021

Tree Renovation Part 9.....Palms


 Palm Trees

As they say, a change of scenery is as good as a holiday! 

I have decided to complete some palm trees from the collection, similar basing to my other trees, lots of work, undercoat base coat, ink wash, highlight, I made the root systems for these from green stuff, before I decided to make a resin mould in the two different tree trunk sizes to speed things up for the next 40 odd trees. really happy with the results.

I will use these in the middle east for my modern games and pacific island WW2 games, I am also setting some aside for my 20mm Middle eastern city fight games for gardens and such and making traffic islands with trees etc. 


I say Pierre, I think we have taken a wrong turn......

Saturday, February 20, 2021

Tree Renovation part 8, ......oh the pine


 Ohh the Pine


more pines completed, after this lot I have about 20 to complete and the pines are done, then complete some palms,  then the huge 100 odd european tree collection. 


Tree renovation part 7 ......a sweet palm


Palms 

When I ventured upstairs earlier in the week I also found my Palm trees, suitable either for the desert or Pacific beach landing scenarios.  I purchased in bulk around 80 odd palm trees in three different sizes again from China. So possibly by the end of next weekend they will also be another 80 odd completed trees. Repainting the trunks and foliage, washing then highlighting, plus I will make a master and cast a root base for the three different sizes, so I do not need to green stuff each one individually. I now want some date Palms and will possibly order some in a week or two after I complete my european tree project.

"walk the battlefield in the morning, wargame in the afternoon"™ 

From Caesar to World War Two


cheers

Matt

Tree Renovation part 6 ....your dead!


Dead Trees

Another mix of part renovation and new paint jobs, the large dead trees are metal from the eighties at least and used to be on a square base for a cemetery pulp game, so I pulled them off and added them to the round large 50mm base as per the larger tree renovation. I also added additional root systems from green stuff, then a new coat of paint, inks, drybrush and rebased to match the other renovated trees. 

The smaller stumps I purchased a long time ago and while digging for spears last week in the spares box I found them and added them to the pile of to be painted terrain box of trees. Notice they have faces so I suspect they are pre 80s metal from one of the fantasy ranges, anyway they will still grace the table without much comment unless someone is looking closely!

these look dead....

Thursday, February 18, 2021

Tree Renovation part Five a pine in the .....

Pines part two


I have come to the realisation I have a lot of pine trees......

More Pines.....


Completed some more Pine trees but come to the realisation after I was about half way through my pine restoration I was missing some of my larger 28mm trees, so up to the third floor storage room for a visit. Low and behold another thirty odd Pine Trees, with a number requiring a bit of a dusting of new flock. plus new bases and more stumps to be made.....so quite a lot to be done. No rest for the wicked as they say.

Monday, February 15, 2021

Tree Renovation part four shruberies


Shrubberies

More garden trees this time,  again purchases from China, really like the little topiary bushes, I must have thirty odd of them to either base or put in gardens, more coming as I have completed cutting another 60 odd bases and prepared them for basing today.


Friday, February 12, 2021

Tree Renovation Part 3 ....Pines


 Pine trees part 1

Still working on trees, really happy with the results, the painting of the bark and stumps, adding a few stones and bits to the bases has been a little therapeutic.

 I am now pressing on through the production line of rebasing the commercial tree lots to unify everything.  Lots more Pines coming after I cut some more bases!

I say Pierre, fine pines 

Monday, February 8, 2021

Tree Renovation part two....shrubbery


 Garden shrubs


Next up are small garden shrubs I purchased from eBay China, about 3cm high they are perfect to fill back yards, town gardens and the side of a road, great for 28mm, 20mm and lower. I am so impressed with these I am going to buy two more packs at least. The bases were cut from MDF using my 2cm holesaw. I glued down the stump base then added my normal sand mix, and painted the stump a khaki brown, base earth brush, drybrushed the rocks added flock. 


"walk the battlefield in the morning, wargame in the afternoon"™ 

From Caesar to World War Two

Cheers

Matt

Tree Renovation part one ....a little fruity


Tree Renovation


 Well last week I commenced renovation of my current collection of 160 trees, plus the manufacture of 180 new trees 20mm and 28mm. Lets just say it is taking longer then expected as I cutting new bases, making forest bases and small rough ground sections, plus painting trunks on old plastics trees, reflocking some and new ground work on all of them, plus washing bark and highlighting bits, adding moss and twigs etc. 

I have decided to manufacture specific 20mm and 28mm as previously I had one size fits all method. I want larger more scale trees for 28mm naturally so they fit better with skirmish games. I also removed all of the trees I had glued on large wood type bases and then manufactured with MDF woodland bases that the trees slot into so they are removable which suits ww2 and large impetus bases better when moving through woods. Still more work to be done on these as I want to complete the trees before I go back to make the larger bases.

First trees completed and renovated were formally orange trees that I had based for arid conditions, these are commercial trees from woodland scenics range. The oranges were repainted as apple trees, new bases, painted the trunks, added rocks and then flocked with 3mm flock. Most of these will go in a walled orchard that I am making and some will be able to be dropped into backyards and gardens as required.

I am really happy with the results and plan to purchase another 20 odd as Normandy and Maine are full of apple trees....


"walk the battlefield in the morning, wargame in the afternoon"™ 

From Caesar to World War Two

cheers

Matt