Showing posts with label TTSFN. Show all posts

Wednesday, September 8, 2021

Terrain Tuesday Tree Renovations - Part 11 Bigger is Better


Bigger is Better when it comes to Trees

As my collection is predominantly 28mm (4500 odd painted figures) I have decided to up my anti and build 28mm scale trees particularly for my Gaulois collection and dark age/early medieval before the fields really started to be tended locally, plus really good for my larger forest stands. These trees are made using my usual practice of oven dried hedge clippings then rubberised horse hair and then woodland scenics powdered flock, basing products, and a large washer on a 50mm base so it fits the magnetic tree base.


If you look at part ten you will of seen a tutorial my method of construction step by step Here


Very happy with the first six, now I need some more flock !


28mm Trees


The Bigger trees are from 18-26cm tall, with magnetic bases to go into the forest bases.


Cheers
Matt

Tuesday, August 3, 2021

Tree Renovations Part 10 Tree Tutorial

 Terrain Tuesday Trees Part 10


Making a wargames tree......

On Sunday I decided to finish off some more trees for the 20mm terrain. You can never have enough trees and I like to have a lot of them in various sizes and colours. I have been making trees for 30 odd years, wire armatures, sticks and commercial boxed ones. I can remember making some when I was around 15 years old using tree sticks and moss from a Stan Catchpol modelling workshop, military modelling article.  Since then I have made several hundred, particularly when I run the Goulburn Valant Stormers Wargames Club, but when I departed Australia I parted with my real timber ones, so upon arrival in France I needed to replace all of them except the evergreens. I prefer to buy my evergreens mostly from model railway companies and make my deciduous trees.

My preference for trunks is hedge cuttings as they already have the branches. Last year I cut down a box hedge in the garden so now have a lifetime supply of branches, which were oven baked then put in boxes awaiting use, classified into 20mm (up to 20cm high) and 28mm (up to 50cm high)

How too


Step 1.
I simply select a number of suitable hedge branches from the stockpile.

Step 2 
Using a hole saw I cut from 3mm MDF 40-50-75mm bases depending upon tree size.


Step 3 
I attach with hot glue, sometimes I also add a tack on large trees, plus make a base and roots too from green stuff.


Step 4
With a 60/40 mix of PVA I paint the base then sprinkle with my builders sand mix, I grade my builders sand into rough and light, I use my rough mix as I get as a bonus rocks and bts on the base. 


Step 5
I paint the base dark earth brown, then dry brush with a tan colour to match our soil here in southern Normandy/Pays de Loire, paint the stones then ink and drybrush. 


Step 6
I tear up the rubberised horsehair into clumps spreading it out into the canopy shape, then attach the rubberised horsehair with hot glue. I buy my rubberised horsehair from upholstery suppliers in the UK.


Step 7  
Select Flock colour, some people make theirs but I have never bothered, I use woodland scenics or NOCH, Faller products.  I use light green, middle green, dark green or even orange-brown (for Autumn) sponge fine flock. I use a deep plastic box for the flock so I can shake off excess and catch it all.


Step 8
I then using latex or washing up gloves I cover the base, placing the tree trunk  between my fingers. Then I use a hobby spray adhesive (from a $2 shop) on the rubberised hair, coating it liberally. The Selected Flock colour is poured into a box, then sprinkle my selected colour, let set, then a second application.


Step 9
I then may add a sprinkle of mixed leaves or colour (white, red and yellow for plane trees, fruit trees in blossom). 

Step 10
I then Varnish the tree with gloss varnish.


Step 11
Clean up and neaten up with scissors, some can have a few character pieces you can leave or cut off. 

Step 12
Add flock, bushes and flowers to the base. 


Simples, ok several hours work over the least three days. I tend to do batches of twenty odd trees at a time.

I still have another 50 plus odd to go but I have run out of middle green woodland scenics as I completed some new 20mm bocage for the ww2 Normandy table as well, but waiting on more flock........For some variation of my 28mm trees I am about to commence my first sea moss trees so wish me luck!

cheers
Matt

Tuesday, March 30, 2021

Terrain Tuesday - Stone Walls

 Stone walls 

I have a few meters of stone walls to complete for my table, some will be fixed to bases with the buildings others will be more adaptable pieces. 
These are the adaptable pieces, I have based them on mdf, then added flock and some flowers and some bushes from rubberized horse hair. Lots more to come, I will possibly also make some taller ones to portray some ten foot 20mm walls for Normandy. 


Cheers
Matt

Thursday, March 4, 2021

Terrain Tuesday Aircraft Flight Stands

 Terrain Tuesday Flight Stands

This week I decided while building the Dassault Mirage III model that I would make another two flight stands for jets, one for Arid and desert games and one more for more green looking european games.

They are mounted on some MDF octagon shaped 10mm deep pieces that I picked up once in a paint shop clearance about 8 years ago. I left with about ten pieces and then had a Hotz mat made to match them for my WW1 Canvas Eagles 1/72 scale aircraft games and I also use them for ww2 larger aircraft like bombers, and DC3-JU52 para landings. Happy with them, although I may add some more bushes to the arid one I thik.


"walk the battlefield in the morning, wargame in the afternoon"™ 

From Caesar to World War Two


cheers
matt


Thursday, February 25, 2021

Terrain Tuesday - more tabletop scatter

 Tabletop scatter

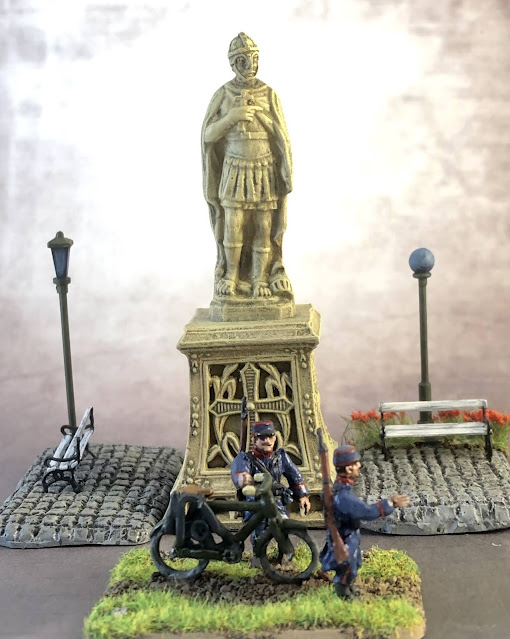
Some more 20mm additions completed for ww2 and modern town and ville scatter. Enjoying these pieces in between painting projects. Again mostly HO train bits, the cross is from a rosary sized set on a base and  large saint Anthony was from a brocante, he was missing his head so now has a essex late roman head. 


Sunday, February 21, 2021

Tabletop Scatter part 1


 Village scatter terrain Part 1


As I move through my renovation projects I have decided to start adding and renovating my village and town accessories, a majority is HO scale model railway pieces which I find particularly good  for 20mm terrain. 

Saturday, February 20, 2021

Tree Renovation part 6 ....your dead!


Dead Trees

Another mix of part renovation and new paint jobs, the large dead trees are metal from the eighties at least and used to be on a square base for a cemetery pulp game, so I pulled them off and added them to the round large 50mm base as per the larger tree renovation. I also added additional root systems from green stuff, then a new coat of paint, inks, drybrush and rebased to match the other renovated trees. 

The smaller stumps I purchased a long time ago and while digging for spears last week in the spares box I found them and added them to the pile of to be painted terrain box of trees. Notice they have faces so I suspect they are pre 80s metal from one of the fantasy ranges, anyway they will still grace the table without much comment unless someone is looking closely!

these look dead....

Wednesday, January 13, 2021

Terrain Tuesday Church

 A completed resin Hovels piece I believe, I already have one of these, and received another in a job lot of 20mm buildings I purchased online. So it joined the terrain to do pile about three weeks ago. I decided to pick it up and paint it on the weekend. A easy and simple paint job. Quite happy with the result, I will de able to use this for both 20mm and 28nm games.


"walk the battlefield in the morning, wargame in the afternoon"™ 

From Caesar to World War Two


Cheers

Matt


Wednesday, December 16, 2020

Terrain Tuesday Artillery Redoubt Fortification

Terrain Tuesday

This terrain Tuesday I am working on another two pieces, one is from my Napoleonic project drawer, the other is from my WW2 20mm project drawer. 

The first piece is a 28mm Horse and Musket to ACW fortified redoubt, I originally made five of these for my Borodino demonstration game  in 2012. I only used four of them for the game as I decided to make the Raevsky redoubt as its own stand alone piece. This piece has been half finished in the terrain drawer for 8 years, about time it departed, as you can see flock is still drying!


cheers

Matt

Tuesday, December 8, 2020

Terrain Tuesday- Steam Traction!


Terrain Tuesdays!

 Each week until March, I have decided to spend some time on some terrain each tuesday, I will try to complete a piece or at least add some detail to a piece of terrain for my table, sometimes really useful or just a filler, results of today's efforts! 

Steam traction engines have always fascinated me, in my childhood I would often visit the neighbours saw mill that has a steam traction engine the dove the great saws that cut down the Australian hardwoods from the forests of New England Tablelands. Later in my teens when I joined the engineers we had as our regiments mascot a Frog and a steam traction engine (2/3 Feild Engineer regiment) and I volunteered to work on the beast. 

So with that in mind I picked up a Steam Engine pencil sharpener around 6 years ago, these are often found in Australian tourist gift shops, particulary in country areas and have been around for 30 odd years. 

First job remove the sharpener and the wheel assembly, add decent axles, then undercoat.

Next I scratch built the flywheel, and the housing 

Then a quick fit before I attach the linkages, then paint job green and red plus Brass work for the bling!


getting close, still some highlighting and bits to do

Mounted, I did F?U and forgot to add the rubber band belt......oh well nothing a bit of superglue will not fix.

Now I am not certain if it will drive a saw mill or a chaff cutter, both were widely used in Maine and Normandy during the war.

The Chaff cutter may be more suitable for Normandy/Maine


Second item I have been working on is a ww2 destroyed resin building, a refurbishment and completion of a part painted piece that has been in my collection for ten years or more. It suffered a little in the move so I decided to do a few repairs and touch ups, a bit more to do then complete.


cheers

Matt

Thursday, November 26, 2020

Coloured WW2 and Modern smoke markers tutorial


 Making WW2 Smoke markers

Terrain Tuesday

Since lock down began here in France I have been concentrating predominantly on my medieval and ancients collection painting over 600 28mm miniatures. This coming week I am shifting my focus back to ww2.

I was recently on John Bonds blog looking at his lovely ww2 terrain. So I have also decided to make from now on "Tuesdays Terrain day", making terrain or tabletop scatter a priority each week to get through the tonnes of small projects I have in my head for ww2 and modern bits, predominantly though for ww2. Most of these pieces will take several days and possibly weeks, but spending a dedicated day on them will help me get through the list.  

For year and years of ww2 and modern gaming I have just used cotton wool or lounge stuffing that is white for smoke markers, and while watching Band of Brothers...again, I watched the scene at the ferry crossing and thought....I do not use coloured smoke in my games...I have just used white smoke markers, but as we know they were mostly coloured for  ww2 and moderns warfare.

Anyone who served in the military will know they are not particularly good for your health, but neither is getting shot!  The smoke delivery could be via a grenade, mortar or artillery round, or a smoke generator either vehicle or a pump (normally white/grey though) the main colours available were, Red, Blue, Green, Purple, yellow, white, plus pink and  Orange (both post ww2)

So I have put together a simple tutorial.

Step 1 :Lounge stuffing is my choice of product, easy to find and cheap.


Step 2: I selected my colours and made up a wash, with a drop of detergent to break the surface tension of the stuffing and allow colour to penetrate. A few drops of paint 10% to 90% water. Dropped in the pieces that were teased out to shape. 

Step three. Rinse with water, to get rid of any settled pigment otherwise they will shed bits. allow to dry. 

Step 4. I based mine on clear plastic with a hot glue gun. 

Step 5. Put them on the table ! 

Lessons.

Quite happy with the result, but  I think it would be faster to use a spray paint tin in the desired colour or a airbrush, plus the colour will be more vibrant,  I will try again soon on another Tuesday! 


Cheers

Matt


Friday, October 30, 2020

28mm HUGE Castle -Chateaux build Part 1


Huge 28mm Castle/Chateau Epic Build

28mm Castle Project Part 1


Last week at French Wargames Holidays Phillipe and I joined forces for an afternoon of working on the new 28mm Chateau terrain. This terrain board is based on Chateau Sant Suzanne which is a famous medieval hill top defensive Chateau and town. This very early circa 1060AD stone castle dominates the valley and the pass north from Maine into Normandy. Most famous for its siege by William the Conqueror in the 1059s and the 1080s which became the only Chateau in Maine he could not capture.

Saint Suzanne is only 30 min from French Wargames Holidays and is one of our top destinations for visitors, being listed as one of the most beautiful villages in France. It really captures the reason why such a castle controls the landscape as far as the eye can see....


I have spent a lot of time planning this piece as I want it to be able to swap out the fortifications over a lot of periods, I have already started filming and will post it on Youtube in stages so you can follow what I am thinking and planning. I really want it to be very versatile options will include:-A Gaulois oppidum, of either the Aulerci Diablintes or Cenomani (Le Mans) the first siege in the 1st century BC (of which only the roman siege camp remains outside the walls and burnt remains on the dig)A Carolingian Fort and watch tower, based on remains that was found during the archaeological digs from the 6th century-9th century.10th century stone Donjon and timber Motte and Bailey walls, the chateau was sieged William the conqueror during his wars with his son and the duke of Anjou. And again during the Plantagenet wars of Stephen and Matilda and then again during Richard the Lion hearts rebellion against his father Henry and finally by Arthur of Brittanys Claim to the crown over John Lackland.15th century Hundred Years War being sieged three times in the period.Wars of Religion sieged by the duke of Mayenne against the Protestants.possibly also used as a big mountain for 20mm WW2 Swiss-Normandy hills (Domfront to Flers ridge) or large mountain 28mm games for French Revolution or Napoleonic Games.
For scale the terrain piece will be 1.50m long x 1.2m wide, and about 50cm high. The board will be broke into the upper Chateau and the lower town, with permanent pieces that lift on and off for ease of storage, plus with additional pieces could have a mountain grass land on top or even perhaps ruins for landscape games.
Some pictures for inspiration


The planning of the layout begins.....


wish me luck


cheers
Matt


Saturday, August 15, 2020

British Airborne C.L.E containers

Completed ten C.L.E containers last week, scratch built containers from two part putty and sprues that were cut to size and drilled out. Quite happy with them, the parachutes are from my own resin mold that was made 8 years ago or more. Be nice additions to my DDay and Arnhem table terrain bits.

My full article about British Airborne C.L.E containers is here.


Cheers
Matt